Milling Rough Lumber Made Easy
Transform rough wood into usable material.

Milling rough lumber is a key step in woodworking that allows you to turn raw, unprocessed wood into smooth, usable boards. Whether you're building furniture or crafting decorative items, understanding how to mill lumber effectively will enhance your projects. This sub-hub offers guidance on tools, techniques, and tips to help you achieve the best results with your rough lumber.
Key highlights
- Essential milling tools explained
- Step-by-step milling guide
- Tips for selecting wood types
- Common milling mistakes to avoid
- Expert advice for best results
How to choose (and common mistakes)
Choosing the right milling tools can significantly affect your woodworking projects. Start by selecting a planer or jointer based on the thickness and width of your lumber. A planer is great for leveling surfaces, while a jointer ensures straight edges. Avoid common mistakes like using dull blades, which can lead to tear-out and uneven surfaces. Additionally, ensure your lumber is dry and free from defects before milling to avoid complications later. Always check your tool settings and calibrate them for the thickness of your lumber to achieve smooth results.
⚡ Quick Picks
Three strong options to start with. Pick one that matches your goal, then jump to the guides below.
Nicpro Carpenter Pencil with Sharpener, Mechanical Pencils Set with 26 Refills, Deep Hole Marker for Construction, Heavy Duty Woodworking Tools for Architect (Black, Red) – With Case
Valued Carpenter Pencil Set: You will get 2 pcs solid carpenter pencils with 26…
Deep Hole Marker Pencil: The deep-hole construction pencils adopts 45mm elongated tip design, which is more convenient to mark in the small hole or in…

Wood Carving Kit Whittling Kit: Deluxe Wood Carving Tools Knife Set with Leather Case – Woodworking Hobby Kit for Beginners Adults Kids – DIY Art Craft Gift for Men Teens
[Wood Carving Kit Deluxe Edition] BLUVIZO wood carving set provides everything f…
[Upgraded Wood Carving Knife] Our knife blade is sharp and easy to use, the metal cap holds the blade in place and prevents the blade and handle from…
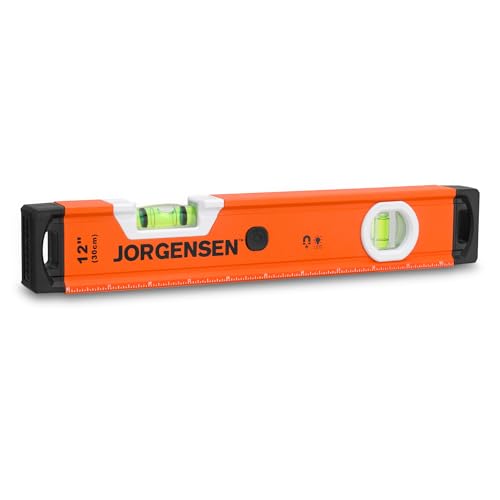
JORGENSEN 12 in. Magnetic Torpedo Level with 90°/180° Bubble Vials, Light Up Spirit Level, Shockproof Rubber End Caps, Metric & Imperial Scale, Aluminum Frame, for Home Installations & DIY
Delivers high accuracy of 0.029° (0.5mm/m), ideal for precise leveling, alignmen…
Equipped with LED illuminated bubble vials at 90°and 180°, this LED level ensures clear visibility in low light conditions, dark rooms, and tight work…
We hand-pick these based on real testing and reviews.
Related Topics
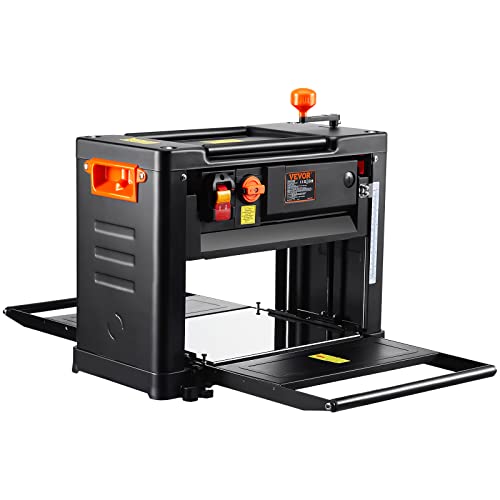
Thickness Planers
Jointers
Benchtop vs Floor Models
Spiral Cutterheads & Upgrades
Setup, Snipe & Tearout Fixes
Latest Guides

6 Best inch jointers (2026)
Best 6 Inch Jointers for Precision WoodworkingDiscover the top 6 inch jointers that combine performance and reliability for your woodworking […]
9 Best benchtop jointers (2026)
Best Benchtop Jointers for Woodworking Enthusiasts Benchtop jointers are essential tools for achieving flat, smooth surfaces on your lumber. Whether […]

9 Best planers for small shop (2026)
Best Planers for Small Shops: Top Choices Reviewed Finding the right planer for your small shop can elevate your woodworking […]
9 Best thickness planers for woodworking (2026)
Top Thickness Planers for Woodworking Enthusiasts Finding the right thickness planer can elevate your woodworking projects to the next level. […]
9 Best benchtop planers (2026)
Top 5 Benchtop Planers for Every Woodworker Finding the right benchtop planer can elevate your woodworking projects by ensuring smooth, […]
How We Choose & Recommend
Short, practical guidance first—then product picks when you are ready.
- We compare features and real-world use cases for Milling Rough Lumber.
- We scan user feedback for patterns (not one-off opinions).
- We call out trade-offs so you can pick confidently.
FAQ
What type of wood is best for milling?
Hardwoods like oak and maple are excellent choices for milling due to their durability and stability. Softwoods, such as pine, can also be milled, but they may require more care to avoid tear-out. Always check for defects like knots or cracks, as these can complicate the milling process. Consider your project needs and choose wood accordingly.
How do I maintain my milling tools?
Regular maintenance is crucial to keep your milling tools in top shape. Start by cleaning the blades and removing any resin buildup after each use. Check for wear and replace dull blades promptly to ensure clean cuts. Additionally, lubricate moving parts as recommended by the manufacturer to prolong tool life. Schedule routine inspections to catch issues early.
What is the best way to store rough lumber?
Store your rough lumber in a dry, flat area to prevent warping and moisture damage. Use stickers between boards to allow airflow and minimize moisture accumulation. Avoid stacking lumber directly on the ground, as this can lead to rot. Regularly check your stored lumber for signs of pests or mold, and take preventive measures as needed.
How can I avoid tear-out when milling?
To minimize tear-out, always use sharp blades and adjust the cutting depth to take thinner passes. Feed the lumber in the direction of the grain, which helps prevent chipping. Additionally, consider using a backer board when milling smaller pieces to provide support and reduce tear-out. Keep an eye on your feed rate; too fast can lead to issues.
What should I do if my lumber is warped?
If your lumber is warped, try flattening it with a planer or jointer. Start with the most convex side facing down to create a flat reference surface. If the warp is severe, consider using a moisture meter to check humidity levels and allow the wood to acclimate before milling. Always work with dry lumber to minimize warping during your projects.
How do I choose between a planer and a jointer?
The choice between a planer and a jointer depends on your specific needs. A jointer is best for flattening edges and ensuring straight cuts, while a planer is ideal for achieving uniform thickness across the board. If you have rough lumber with uneven thickness, start with a jointer, then use a planer to refine the thickness. Evaluate your project requirements to decide.
⭐ “Our Top 3 WoodWorking Tools for 2026
Nicpro Carpenter Pencil with Sharpener, Mechanical Pencils Set with 26 Refills, Deep Hole Marker for Construction, Heavy Duty Woodworking Tools for Architect (Black, Red) – With Case
Valued Carpenter Pencil Set: You will get 2 pcs solid carpenter pencils with 26…
Deep Hole Marker Pencil: The deep-hole construction pencils adopts 45mm elongated tip design, which is more convenient to mark in the small hole or in…
Wood Carving Kit Whittling Kit: Deluxe Wood Carving Tools Knife Set with Leather Case – Woodworking Hobby Kit for Beginners Adults Kids – DIY Art Craft Gift for Men Teens
[Wood Carving Kit Deluxe Edition] BLUVIZO wood carving set provides everything f…
[Upgraded Wood Carving Knife] Our knife blade is sharp and easy to use, the metal cap holds the blade in place and prevents the blade and handle from…
JORGENSEN 12 in. Magnetic Torpedo Level with 90°/180° Bubble Vials, Light Up Spirit Level, Shockproof Rubber End Caps, Metric & Imperial Scale, Aluminum Frame, for Home Installations & DIY
Delivers high accuracy of 0.029° (0.5mm/m), ideal for precise leveling, alignmen…
Equipped with LED illuminated bubble vials at 90°and 180°, this LED level ensures clear visibility in low light conditions, dark rooms, and tight work…
We hand-pick these based on real testing and reviews.